
H2 Database
Important Note: Please consult the following post – JNDI vulnerability in H2 database consoles
Install
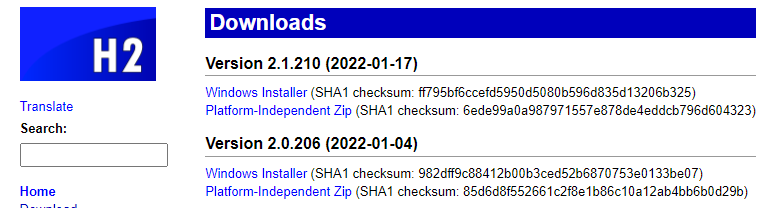
Go to the following page: https://www.h2database.com/html/download.html. Select Windows Installer (“Last Stable” version).
If the install cannot find Java, download and run the following: https://www.minisoft.com/download/?ID=openjdk14
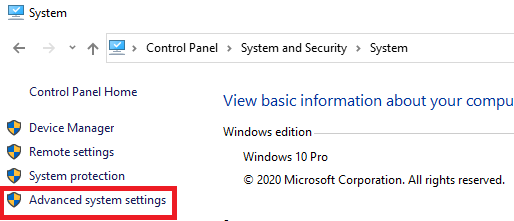
Go to the Control Panel\System and Security\System\Advanced System Settings\Environment Variables.

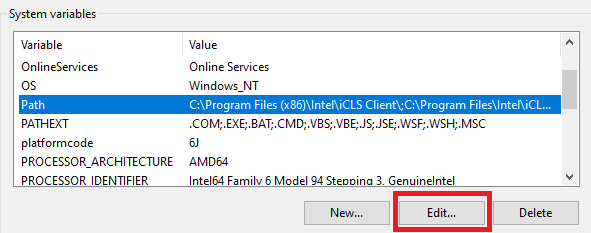
In the System Variables, modify the Path variable to include the bin directory of the Java install directory to the path, such as: C:\Program Files\Java\jdk14.0.1\bin
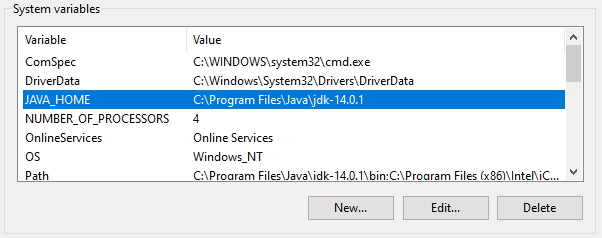
In the System Variables, add a new variable called JAVA_HOME and point it to the same path above, but to the directory above the “bin” directory, such as: C:\Program Files\Java\jdk14.0.1
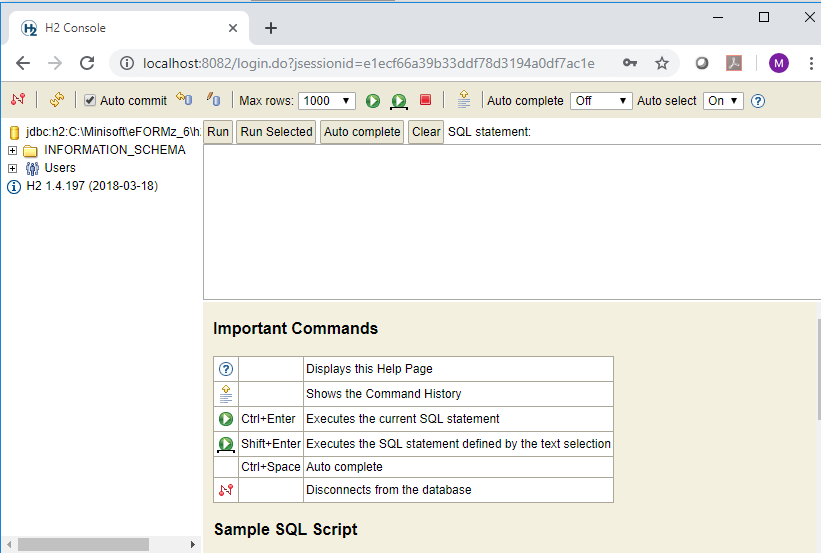
H2 Console
Default Console URL: http://localhost:8082
Create a new database by editing the JDBC URL path, for example:jdbc:h2:C:\Minisoft\eFORMz_6\h2db\companyname;AUTO_SERVER=TRUE
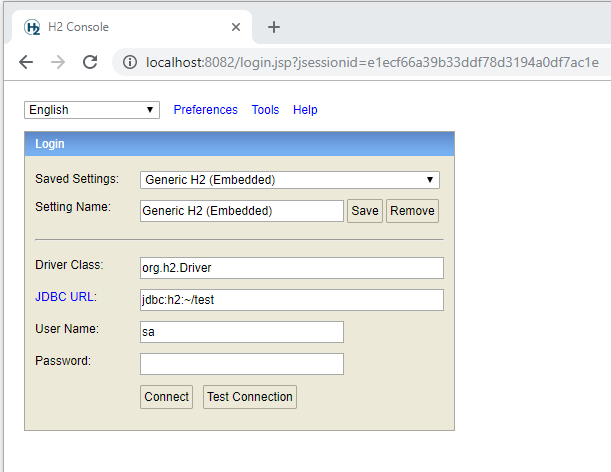
Set the database admin user/password to MINISOFT/password with the following command in the H2 console (H2 forces user names to upper case by default): CREATE USER IF NOT EXISTS MINISOFT PASSWORD 'password' ADMIN;

Databases can be placed anywhere but it’s recommended that they are kept in the h2db folder under eFORMz:
Windows: C:\Minisoft\eFORMz_6\h2db\
Non-Windows: minisoft/h2db/
Making H2 Run as a Service
It is recommended to set the Database Engine to run as an eFORMz service by adding the following entry to your ServiceManagerSettings.xml file in the eFORMz install directory (C:\Minisoft\eFORMz_6 on Windows):
<Service Name="H2 DBMS" Class="com.minisoft.h2.Service" Parameters="-tcp -web -webPort 8083 -baseDir h2db " Start="true" />
Driver Class: org.h2.Driver
Connect URL: jdbc:h2:<path here no <> included>;user=<correct user here>;AUTO_SERVER=TRUE
Add this line and restart the service without the H2 console running.
eFORMz sample project database connection properties
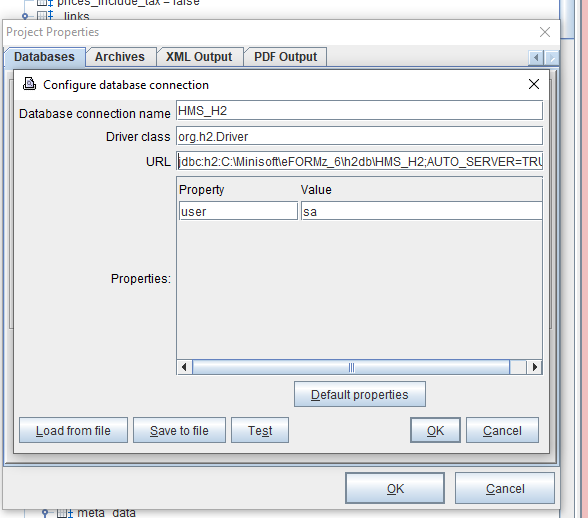
Database connection name: HMS_H2
Driver class: org.h2.Driver
URL: jdbc:h2:C:\Minisoft\eFORMz_6\h2db\HMS_H2;AUTO_SERVER=TRUE
Alt tag: ShipFX