
Where to Set Up Your Database Connection
You have a choice to make when you define your eFORMz database connection:
- Define the connection in the eFORMz Composer.
- Define the connection through the Director Toolkit.
eFORMz Composer database definition
This method defines a database connection in the project’s properties. The database connection is used only by the project on which it is defined. You can save the database connection to a file and import the connection to other projects, including projects on different systems.
- Start the eFORMz Composer and open the project.
- Right click the project in the Project window > Properties > Databases.
- Click New.
- Define the database connection. You might want to refer to the list of supported databases and their URLs.
- Note that there are fields for ‘user’ and ‘password’.
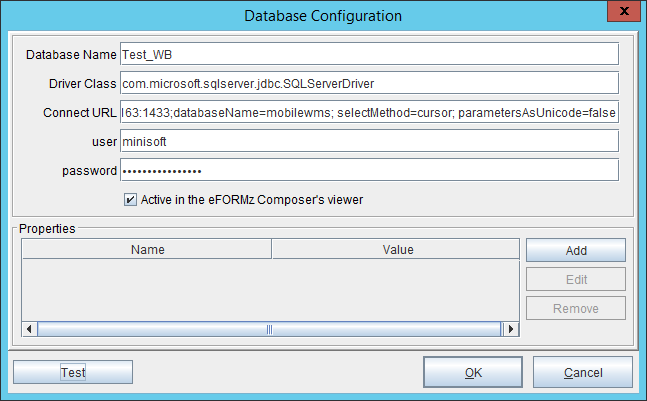 These need to be filled in rather than being embedded in the connection string. If they are not provided you will get the following error:
- Alternatively, you can click Load from file if you have a database connection file that was saved from another project.
- Click Activate.
- Click Test. You should receive a successful confirmation in a few seconds or less.
- Click OK, return to the eFORMz Composer, and save your change.
Director Toolkit database definition
This method defines a database connection in the Director Toolkit. The database connection is available to all projects. To make this connection active while you are editing a project in the eFORMz Composer, you must select “Active in the eFORMz Composer’s viewer.”